Media viewer
- IIIF
By default the processing of images in Media viewer is handled by the browser, however an alternative IIIF (International Image Interoperability Framework) image processing method is available with some configuration.
Both methods allow deep zooming, however IIIF image processing can sharpen an image and enhance its contrast, and allows greater zooming in with less loss of detail.
IIIF-supported image file formats are:
.jpg,.tiff,.png, and.gif; most browsers do not support.tiffnatively.Details about setting up an IIIF image server can be found here.
- Image format transformation on the fly
The Collections WebAPI is able to transform images to a supported format on the fly and display them in your browser without altering the original file.
- Details about the WebAPI can be found here.
- See imageformat for details about format transformation.
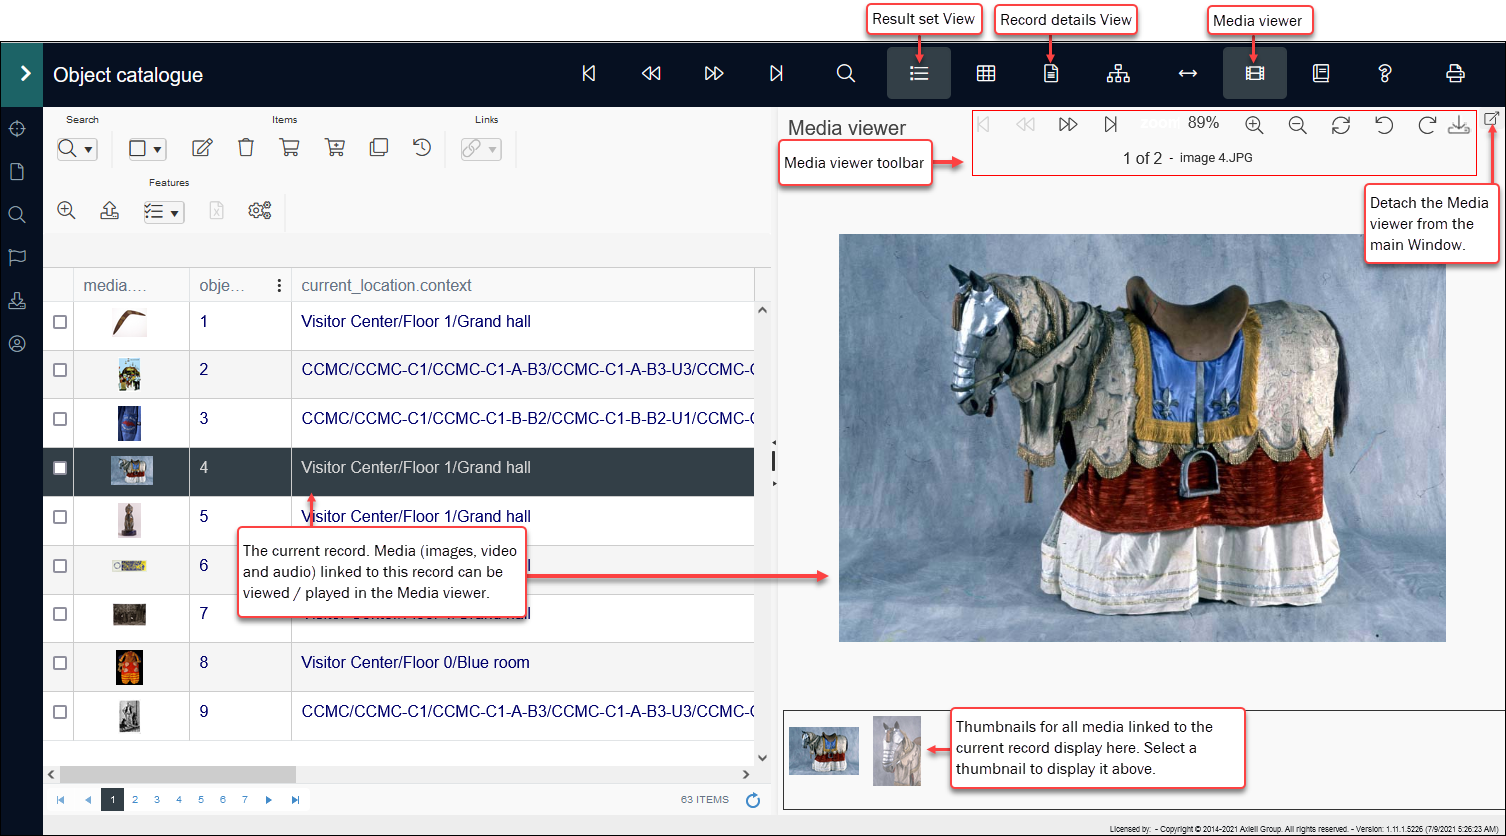
Media viewer is used for displaying images and PDFs1 and playing video and audio media linked to the current record![]() The record currently displayed in Record details View or highlighted (with a solid background) in Result set View or Gallery View for instance. in a dedicated pane:
The record currently displayed in Record details View or highlighted (with a solid background) in Result set View or Gallery View for instance. in a dedicated pane:
Media viewer opens in the main Collections window by default, but it can be detached and viewed in a separate window; if a second monitor is available, it can be useful to move Media viewer to the second monitor, and maximize the window.
Tip: Here we describe how to work with Media viewer. More details about working with media (adding, linking, downloading, etc.) can be found here.
Two versions of the Media viewer are available, the default version powered by your browser (shown above), and an International Image Interoperability Framework (IIIF) viewer. Both versions provide similar functionality, including deep-zooming and image rotation; the chief advantages of the IIIF Media viewer is a substantial performance improvement during the loading and zooming of (IIIF compliant 2) high resolution images, as well as support for .tiff images.
Multiple images
When more than one media file is linked to a record (as with the current record![]() The record currently displayed in Record details View or highlighted (with a solid background) in Result set View or Gallery View for instance. above), it is possible to specify which media file displays first when the record is viewed in Media viewer by specifying that a media file is preferred.
The record currently displayed in Record details View or highlighted (with a solid background) in Result set View or Gallery View for instance. above), it is possible to specify which media file displays first when the record is viewed in Media viewer by specifying that a media file is preferred.
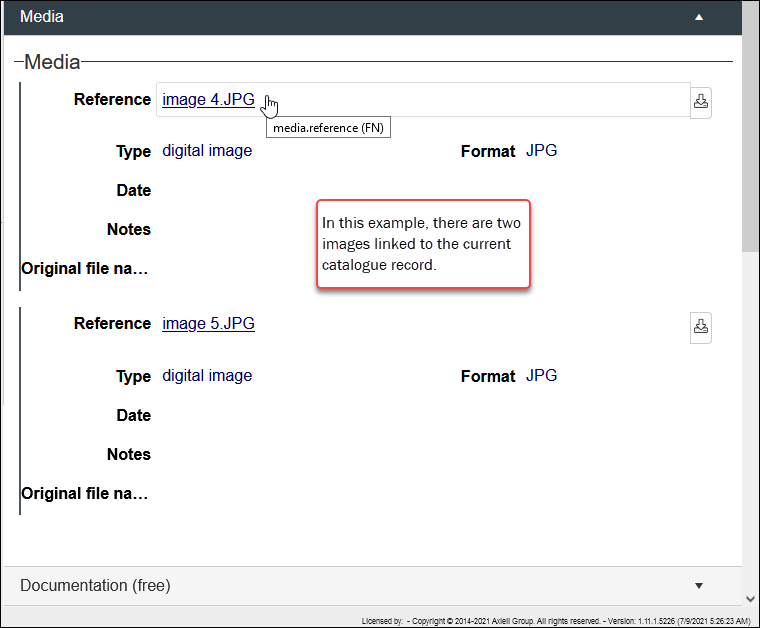
Media files are linked to a record using fields such as media.reference (FN); more than one occurrence![]() If a field in the current record can have more than one value, we add an occurrence of the field for each value (e.g. a book can have multiple authors so we add an occurrence of the author.name (au) field for each author). An occurrence can be a member of a group of fields, and adding an occurrence of the field adds all members of the group at once. of this field can be added, which allows multiple media files to be associated with a record:
If a field in the current record can have more than one value, we add an occurrence of the field for each value (e.g. a book can have multiple authors so we add an occurrence of the author.name (au) field for each author). An occurrence can be a member of a group of fields, and adding an occurrence of the field adds all members of the group at once. of this field can be added, which allows multiple media files to be associated with a record:
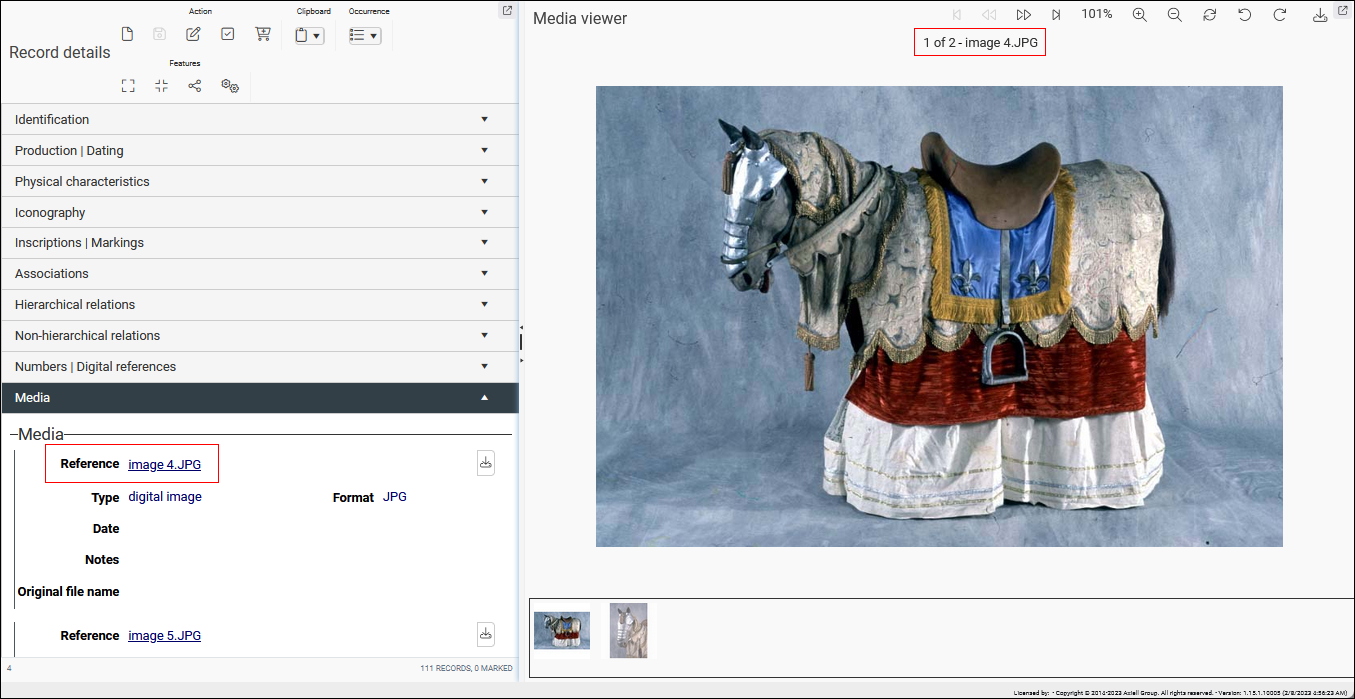
When more than one media file is linked to the current record, the first occurrence is shown by default when the record is viewed in Media viewer, Result set View and Gallery View. In this example, two images are linked to the current Object catalogue record and the first occurrence (image4.jpg) displays by default when the Object catalogue record is viewed in Media viewer:
By marking another linked media file as preferred, it will display instead when the current record is opened in Media viewer (or listed in Result set View and Gallery View). We do this in Record details View:
- Enter Edit mode
 A record is either in Display mode (we view its details) or Edit mode (we add or edit its details). A record enters Edit mode as soon as we create a new record, copy a record in Record details View or edit an existing record. by clicking
  in the Record details View toolbar or use the keyboard shortcut, F11.
 -
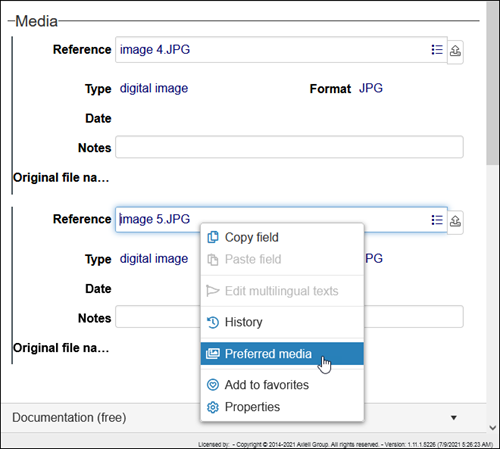
Right-click the preferred media reference and select Preferred media in the context menu:
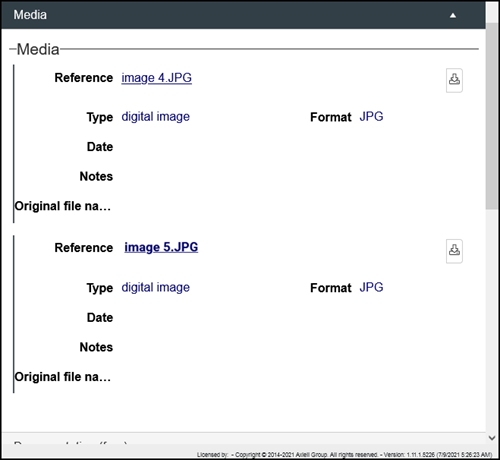
When the record is saved the reference will be bold to indicate its preferred status:
Only one media file can be preferred per record. To remove the preferred status, edit the record and either:
- Right-click a media reference with the preferred status and select Reset preferred media in the context menu:

-OR-
- Set a different media reference to preferred.
To help identify images when more than one media file is linked to a record, an image's reference displays above the image, image4.JPG in the screenshot above3. An image's reference (typically its file name) is stored in the Reference (media.reference (FN)) field, which is found on the Media panel in Record details View:
Axiell Collections is an HTML5 web-based Collections Management System (CMS) that runs in any modern browser, notably Mozilla Firefox, Microsoft Edge, Google Chrome and Apple Safari. The range of media formats supported by the default Media viewer is determined by your browser and HTML5 video / audio player:
- Image formats: JPEG (
.jpeg), BMP (.bmp), GIF (.gif), PNG (.png), WebP (.webp) and AVIF.avif).
Safari supports TIFF (.tiff), HEIC/HEIF (.heic/.heif), and JPEG-XL (.jxl) natively; other browsers may be able to support these through plug-ins / add-ons.Note: The Collections WebAPI is able to transform images to a supported format on the fly and display them in your browser without altering the original file.
- Audio: MP3 (
.mp3), WAV (.wav), Opus (.opus) and Ogg Vorbis (.ogg), AAC (.aac), M4A (.m4a). - Video: MP4 (
.mp4) with AAC audio and H.264 or AV1 video, WebM (.webm) with Opus or Vorbis audio and VP8, VP9 or AV1 video.
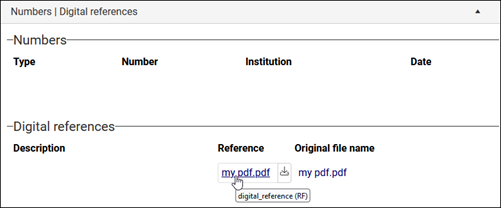
Word docs and URLs (and other digital references) are best linked to a record using a field with an Application field type such as File (digital_reference (RF)) on the Digital references panel in the Standard Model or Reference (digital_reference (RF)) on the Numbers | Digital references panel in older Model Applications.
In versions of Collections older than version 1.16, PDFs are also most usefully linked to the digital_reference (RF) field. As the name suggests, a field with an Application field type is associated with an application, such as a PDF reader; when a .pdf file is linked to such a field, it can be opened in a browser tab by clicking the underlined data (typically a file name) in the field:
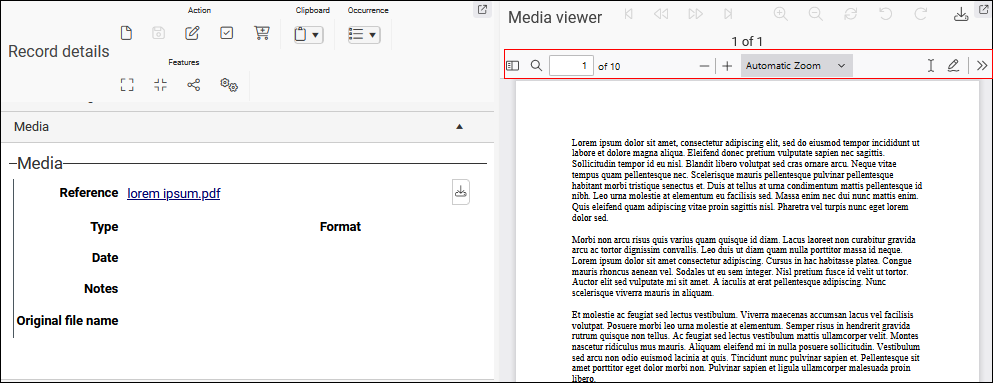
Since Collections version 1.16 the Reference (media.reference (FN)) field on the Media panel can also be used to link to a Media4 record for a PDF. Linked this way the PDF can be viewed in the Media viewer:
Note: While it is also possible to link a PDF to a media field like Reference(media.reference (FN)) in versions of Collections older than version 1.16, clicking the underlined file name does not display the document.
Details about adding media files to Collections can be found here.
When viewing a PDF in the Media viewer a toolbar is available for working with the PDF.
|
Icon |
Name |
Details |
|---|---|---|
|
|
Show / Hide contents pane |
Useful for navigating a PDF with multiple pages: select a page icon to jump to that page. |
|
|
Find |
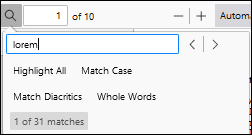
Search the text of the PDF:
Click the icon again to hide the drop-down. |
|
|
Previous / Next |
Move to the previous / next page. |
|
|
Page |
Shows the current page number. Enter a page number and press Enter to jump to that page. |
|
|
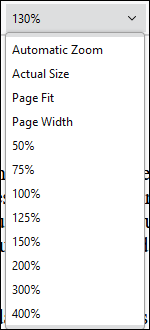
Zoom |
Zoom out / in by clicking the
|
|
|
|
Print the document (annotations / drawings will be included in your printed document). |
|
|
Save |
Save the document annotations / drawings will be included in your saved document). Tip: Use the Download |
|
|
Annotate the document |
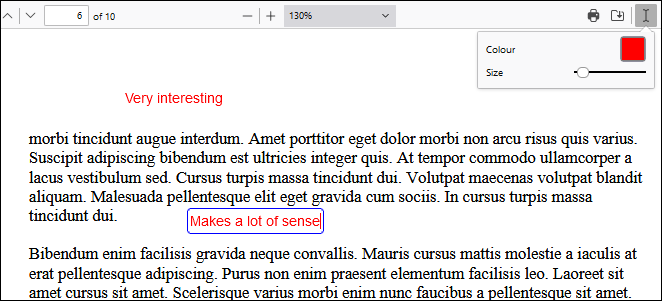
Click the icon and (optionally) set a text size using the slider and colour, click the document and type: Note: annotation are NOT stored in the PDF, however it is possible to download or print the document with your annotations using the Save Click the icon again to stop annotating the document. |
|
|
Draw |
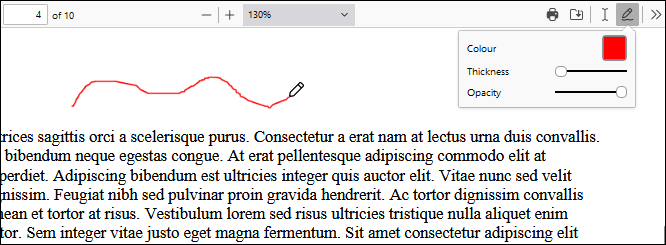
Click the icon and (optionally) set a colour, pen thickness and opacity, click the document and draw (signature, underline, etc.): Note: drawings are NOT stored in the PDF, however it is possible to download or print the document with your drawings using the Save Click the icon again to stop drawing on the document. |
|
|
Menu |
Click for options to rotate the document, scroll, show multiple pages, etc. |
The Media viewer comprises three parts: the toolbar at the top; the main display area; and thumbnails at the bottom of the pane.
A thumbnail will display at the bottom of the Media viewer pane for each media file linked to the current record. In the case of images, the thumbnail will show the image itself; the thumbnail of audio and video files will be an icon:
![]()
![]()
To display or play the media in the main display area of the Media viewer:
- Click an image thumbnail to display the image (shown above).
- Click the audio icon to display an audio controller:

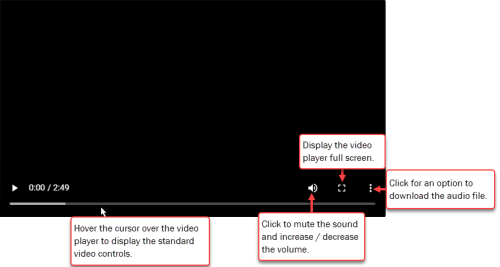
- Click the video icon to display the video player:
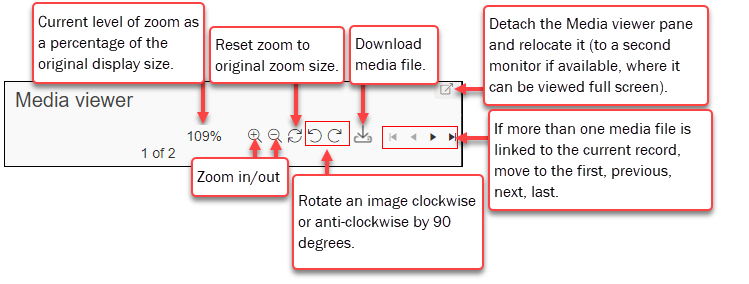
The Media viewer toolbar
Note: The IIIF Media viewer toolbar is a little different to that described here but the functionality is essentially the same.
| Option | Icon | Details |
|---|---|---|
| Zoom |
As you resize the pane, an image will automatically resize to suit the available space. The zoom level is a relative measure (a percentage) determined by the size of the Media viewer pane. Tip: If your mouse has a scroll wheel or equivalent, it is possible to zoom in / out by placing the cursor over an image and scrolling up / down. You may need to press the SHIFT button on your keyboard as you scroll. |
|
|
Slider |
|
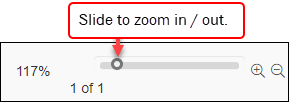
In versions of Collections prior to 1.10.1, a slider can be used to zoom an image in / out:
|
|
Zoom in / out |
|
Click to zoom in (+) and out (-) by 20%. |
|
Reset zoom |
|
Reset zoom to the original display size (see Zoom above). |
|
Rotate |
|
Rotate an image 90 degrees clockwise or anti-clockwise. |
|
Download5 |
|
Download the file for the current media. The media file is saved to your Downloads folder. Note: If the icon is greyed out, downloading of media files has been disabled by your Application Administrator. |
|
Navigate media |
|
If more than one media file is linked to the current record, click to navigate to the first ( |
Note: Zooming and rotating only change the display of an image while viewing the current record; they do not change the media file itself.
Using your mouse to zoom in / out, and to drag an image
If your mouse has a scroll wheel or equivalent, it is possible to zoom in / out by placing the cursor over an image and using the scroll wheel to scroll up / down.
It is possible to drag an image within the Media viewer pane simply by left-clicking the image, dragging the cursor and releasing the mouse button. This is useful if you have zoomed in and the image is now greater than the display area and you want to centre some part of the image in the display area.
