Result set View
- User access permissions
User access permissions are assigned to almost every aspect of Collections from access to individual fields and records to functions such as record entry, deletion of records, location management and reporting. Unless authorized, users will not have access to many of the functions described on this page.
Roles and access rights are managed in Axiell Designer
 A tool for designing, creating, customizing and managing Axiell Collections applications and databases, broadly speaking, the Axiell Collections Model Application. As well as managing databases, including user access and permissions, Designer is used for such tasks as translating field labels, tooltips, values in drop lists, etc.. An overview of Users and roles and User authentication and access rights is available here.
 - Default columns in Result set View
Records in Result set View are listed in a table of one or more columns, where a column is a field in the record. Each row in the table is a record returned by a search; retrieved from a saved search; newly created; following the import of records, etc.
Application Administrators specify a default set of columns for the Result set View in each data source
 The management of a collection can involve a vast amount of information about objects / items / books, people and organizations, events, administration and more. This information is stored as records in data sources. Each data source stores a specific type of information: details about collection items, people, events, loans, and so on.. The default set of columns is specified in a screen definition file called something similar to Brief display objects (
br_object.fmt) or Brief display Archives (br_archv.fmt). -
Editing records in Result set View
In some implementations of Collections users are able to edit records directly in Result set View by clicking an Edit
 button in the Result set View toolbar (disabled by default in the Standard Model).
It is important to understand that when editing records in Result set View, Collections automatically saves an edited record without asking the user to confirm that changes should be saved whenever the user closes or leaves the edited record. In other words, the Save Prompt does not display (this is also true when clicking the Save record
 button in Record details View).
If it is preferable that users always confirm their changes are saved, the Always prompt before saving option in
settings.xmlwill restrict the ways an edited record can be saved to those that display the Save Prompt (it will not be possible to edit a record in Result set View):<Setting Key="AlwaysPromptBeforeSave" Value="true" />
When disabled in Result set View, editing of records is always done in Record details View.
Details here.
A consequence of setting Always prompt before saving to
trueis that the Save button does not display in the Record details View toolbar (the Result set View edit functionality and Record details View save functionality are linked). In this case, editing and saving of records in Record details View are both enabled by selecting the Edit
  button. The Save Prompt always display in Record details View when the Edit
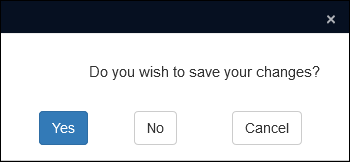
  button is clicked or a user leaves an edited record (by clicking another record in Result set View for example):
The The
EnableResultSetEditsetting1 can be used instead ofAlwaysPromptBeforeSaveto disable editing in Result set View without also disabling the Save record button in Record details View:
<Setting Key="EnableResultSetEdit" Value="false" />Details here.
- Bulk create records
See How to use the Bulk create records window in the Application configuration options topic for details about configuring this feature, including configuring automatic numbering; and limiting which screens are available to users in the Bulk create records box.
- Links
Record linking options available from the Links
 drop list in the Result set View toolbar are specified in Axiell Designer as Connections. An overview of Connections is available here; details about configuring Connections is available here.
 - <Simple search>
For each data source it is possible to add a <Simple search> option to the Search drop list that performs a search across multiple indexed fields simultaneously. A Simple search method must be configured in Axiell Designer
 A tool for designing, creating, customizing and managing Axiell Collections applications and databases, broadly speaking, the Axiell Collections Model Application. As well as managing databases, including user access and permissions, Designer is used for such tasks as translating field labels, tooltips, values in drop lists, etc. for each data source in which the Simple search option is to be available. Details here.
 -
Merge records functionality
To enable Merge records functionality in a data source add the RecordMerge method to the data source's list of methods. For reasons described below, it is advised that access to this functionality is restricted to power users. Details about enabling this functionality can be found here.
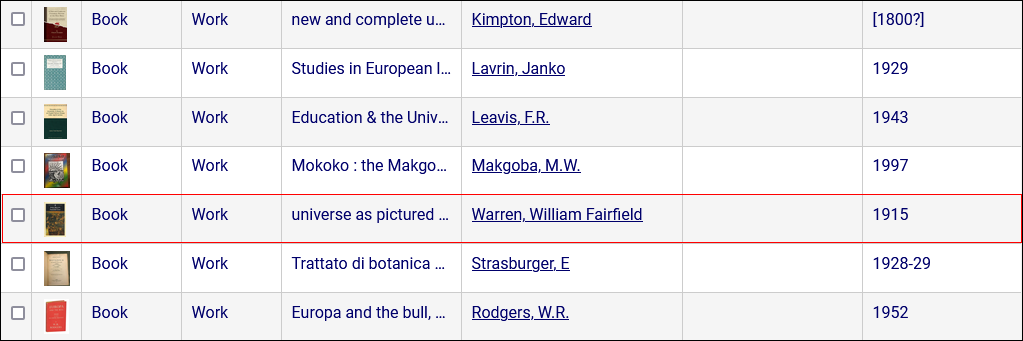
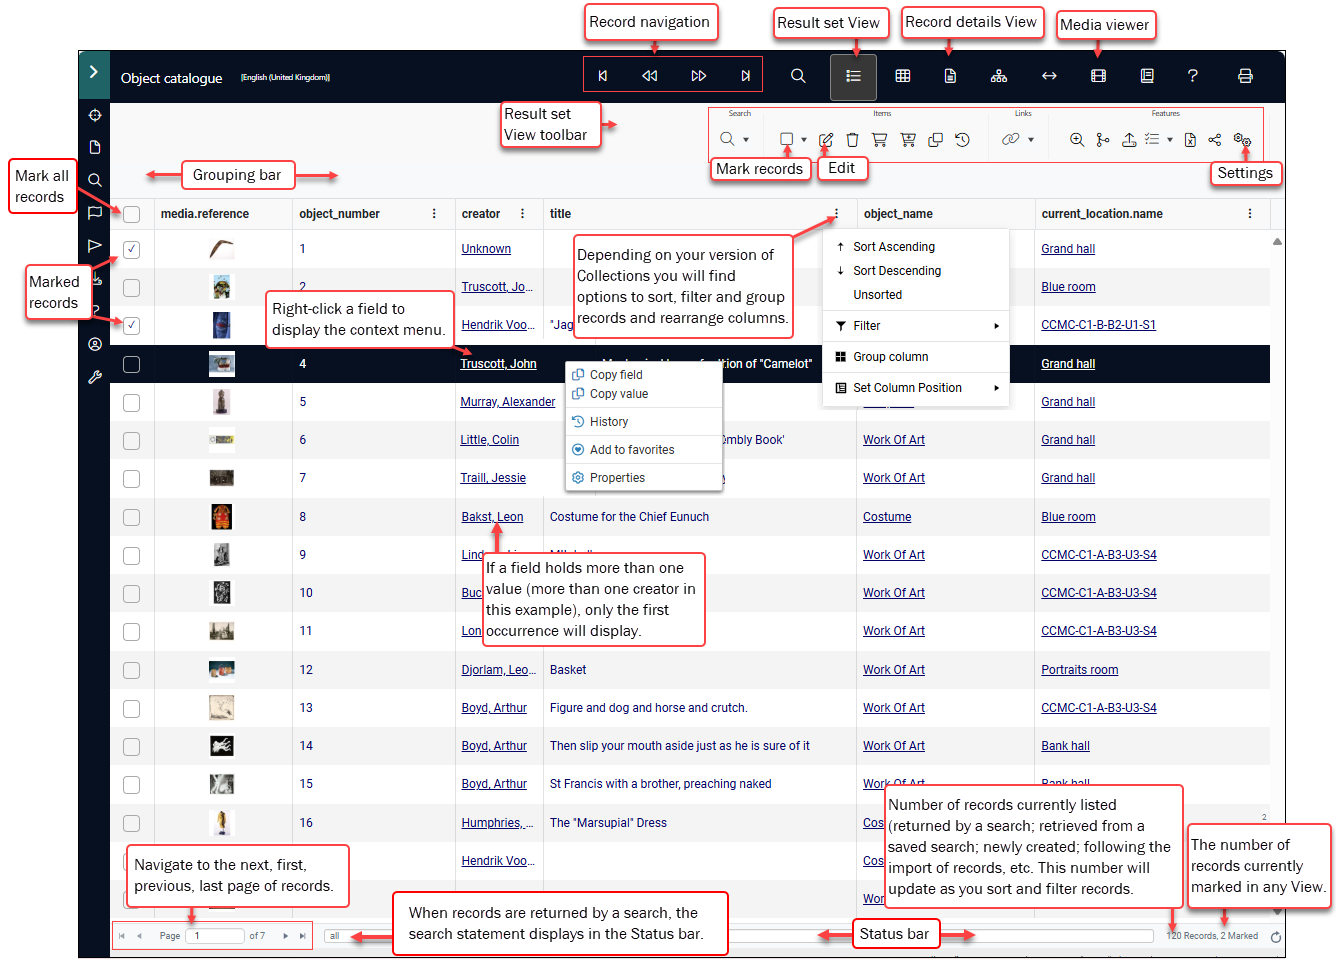
Result set View displays a list of records returned by a search; retrieved from a saved search; newly created; following the import of records, and so on. Records are listed in pages, and a pagination control at the bottom of the Collections window provides access to all pages. This View provides a summary of the data available in a record using a subset of fields. Records are listed in a table of two or more columns:
- Each column (with the exception of the first) is a field in the record. A default set of fields is specified for each data source
 The management of a collection can involve a vast amount of information about objects / items / books, people and organizations, events, administration and more. This information is stored as records in data sources. Each data source stores a specific type of information: details about collection items, people, events, loans, and so on.. A field's system name is the column header.
Tip: You can configure which fields are used in Result set View via Settings.
- Each row holds a single record.
- The first column holds a checkbox per record that can be clicked to mark
 Marking a record means selecting it by adding a tick to the record's checkbox in Result set View or Gallery View, and in Record Details View from Collections 1.15 onwards. One or more records can be marked and then actioned in some way (e.g. printed). / unmark the record. Marked records can then be processed in bulk in various ways.
 The Result set View toolbar includes a drop list of options for marking of records, including mark all / unmark all, drop marked records, etc. (details below). If the column header row includes a checkbox2 (as shown below), it can be clicked to mark / unmark all records currently listed.
- Each cell in a row can hold a single value. If a field can hold more than one value (author.name (au) for instance), only the first occurrence
 If a field in the current record can have more than one value, we add an occurrence of the field for each value (e.g. a book can have multiple authors so we add an occurrence of the author.name (au) field for each author). An occurrence can be a member of a group of fields, and adding an occurrence of the field adds all members of the group at once. displays in a cell.
Result set View is displayed / hidden by selecting its button in the top Toolbar:
Versions of Collections prior to release 1.10.1 have two record display options that are no longer available:
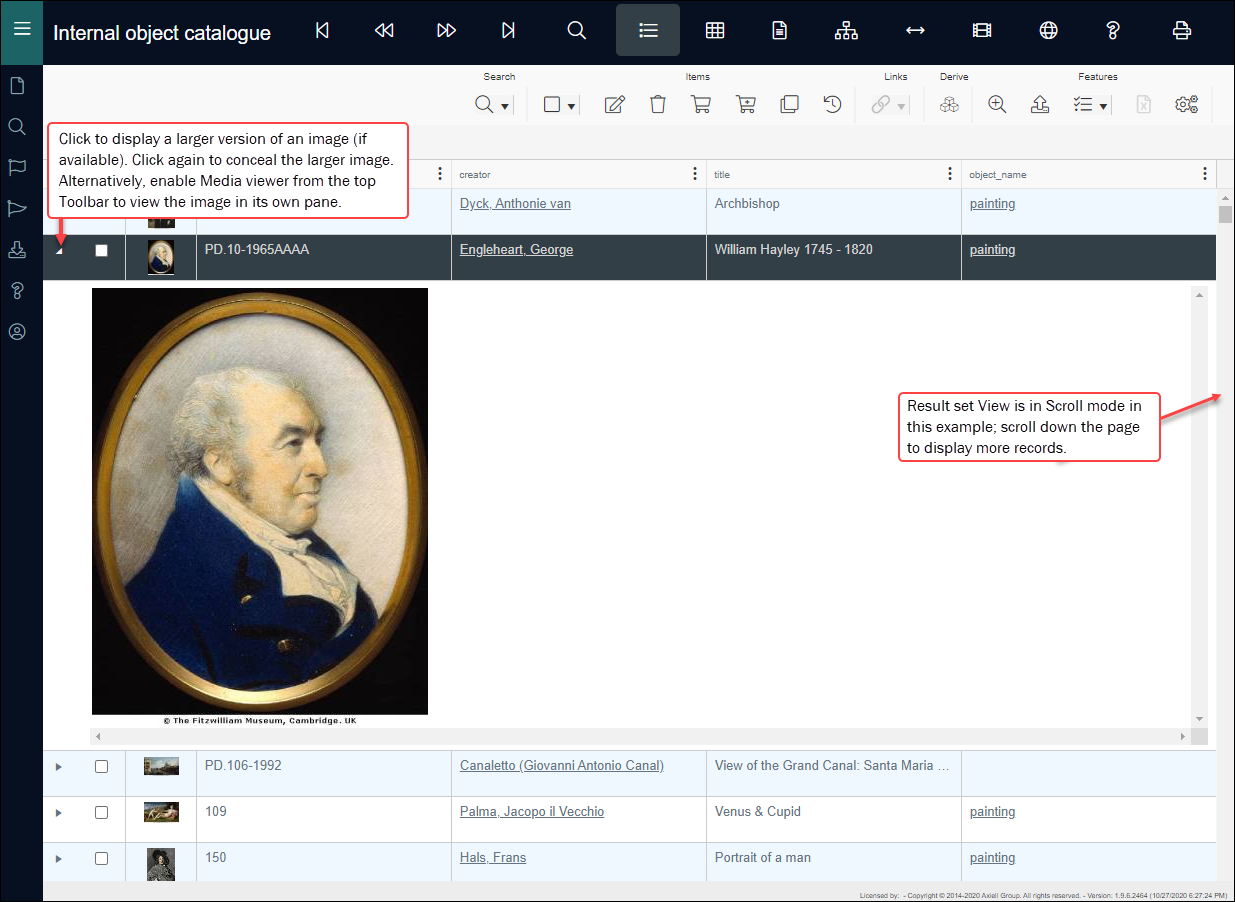
- Scroll mode
Records can be displayed and listed in one of two modes, Virtual and Paged. In Virtual mode records are listed as a single, scrollable list (up to 40 records are displayed initially, with the next 40 displayed as you scroll down the page, and so on). In Paged mode, records are listed in pages (up to 40) with a pagination control at the bottom of the Collections window providing access to pages.
For technical and performance reasons, Virtual mode has been dropped from Collections 1.10.1 leaving only Paged mode.
- Details content
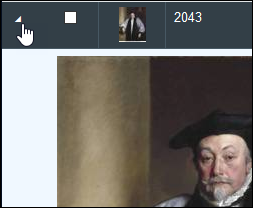
Result set View offers the option to display a larger version of a thumbnail image within the View itself by expanding a row with the click of a triangle beside the checkbox (shown above).
As this option was rarely used (two Views provide better image display features: Gallery View and Media viewer), it was removed with release of Collections 1.10.1. This has the advantage of simplifying the User Interface.
Both of these options are managed in the Result set View Settings box (details below).
Unless restricted by your organization, the data displaying in Result set View can be edited by selecting Edit in the Result set View toolbar.
The same set of records will be listed in Result set View and Gallery View; the current record![]() The record currently displayed in Record details View or highlighted (with a solid background) in Result set View or Gallery View for instance. is the same in Result set View, Gallery View and Record details View: selecting a record in one View will select it in the others and make it the current record.
The record currently displayed in Record details View or highlighted (with a solid background) in Result set View or Gallery View for instance. is the same in Result set View, Gallery View and Record details View: selecting a record in one View will select it in the others and make it the current record.
Marking![]() Marking a record means selecting it by adding a tick to the record's checkbox in Result set View or Gallery View, and in Record Details View from Collections 1.15 onwards. One or more records can be marked and then actioned in some way (e.g. printed). a record in one View will mark it in the others3.
Marking a record means selecting it by adding a tick to the record's checkbox in Result set View or Gallery View, and in Record Details View from Collections 1.15 onwards. One or more records can be marked and then actioned in some way (e.g. printed). a record in one View will mark it in the others3.
A useful combination of Views is Result set View alongside Record details View: the current record![]() The record currently displayed in Record details View or highlighted (with a solid background) in Result set View or Gallery View for instance. is always the same in each View, so as you move from one record to another in Result set View (by clicking a record or using the Record navigation buttons in the top Toolbar), all available details for the current record will display in Record details View.
The record currently displayed in Record details View or highlighted (with a solid background) in Result set View or Gallery View for instance. is always the same in each View, so as you move from one record to another in Result set View (by clicking a record or using the Record navigation buttons in the top Toolbar), all available details for the current record will display in Record details View.
Note: Result set View cannot be detached from the main Collections Window.
Working in the Result set View window
Read on for details about the features and elements identified in the image above:
The Result set View toolbar sits below the top Toolbar and contains functions for processing and interacting with records listed in this View:

Notes
- Some of these functions may not be available in your system, or you may not be authorized to use them (speak to your Application Administrator if you require access to these functions).
- Some options will be inactive until one or more records are marked (checked / ticked).
| Option | Icon | Keyboard shortcut | Details | ||||||||||||||||||||||||||||||||
|---|---|---|---|---|---|---|---|---|---|---|---|---|---|---|---|---|---|---|---|---|---|---|---|---|---|---|---|---|---|---|---|---|---|---|---|
|
|
|
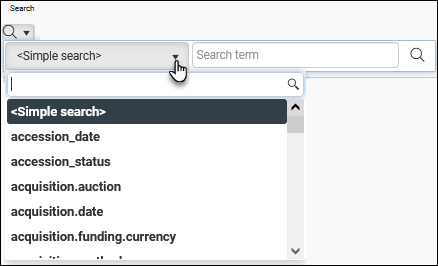
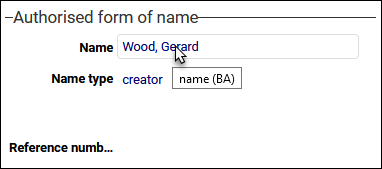
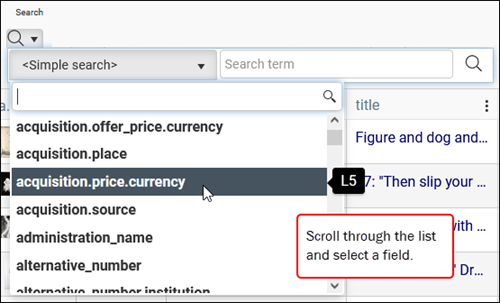
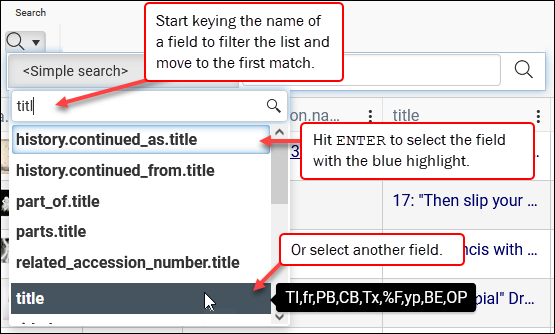
Perform a basic search in the current data source The chief virtue of this search option is its simplicity: you select a field to search from the drop list and enter a search term. You can apply wildcard characters ( That's basically it. Although there is, of course, more going on. A strength of this search option is that fields in the drop list can be associated with related fields so that more than one field is searched your search term. If available in your system, the <Simple search>4 option is configured to search multiple fields at once. If you hover the cursor over a field or <Simple search>, a pop up displays the field tag
More advanced searches:
|
|||||||||||||||||||||||||||||||||
|
|
|
Each row in Result set View includes a checkbox that can be marked Select an option in the Mark records drop list to mark all records (add a tick to the checkbox in all rows); toggle the marking of records (marked records become unmarked and vice versa); or to keep / drop marked records. Marked records can be processed in a range of ways. Tip: Marking a record in Result set View also marks it in Gallery View and Record details View. Note that the Mark records options affect all records listed on every page in Result set View, not just the records listed on the current page. In this example, all 103 records across every page will be marked / unmarked together:
The number of marked records is shown in the Status bar in Result set View and also Record details View5:
Marked records can be processed singularly or in batch in a number of ways such as:
The following options are available from the Mark records button:
|
|||||||||||||||||||||||||||||||||
|
|
|
Edit records directly in Result set View. If the Edit button does not display, you are either not authorized to edit records or editing in Result set View has been disabled. If the latter, you will be able to edit records in Record details View. Note: For more details, read Editing records in Result set View and saving records in Record details View in the Information for Application Administrators at the top of this page.
Result set View only displays a subset of fields in a record:
Context menu When editing a record you can right-click a field to access a contest menu with three options:
Details below. |
|||||||||||||||||||||||||||||||||
|
Delete record(s) |
|
|
Delete the current record See How to delete records for details about deleting records (and recovering deleted records). |
||||||||||||||||||||||||||||||||
|
|
|
Save records currently listed in Result set View (and Gallery View) as a group. It is possible to save all records listed or just marked records. If records currently listed were returned by a search, the search term(s) used to generate the record set can be saved, and the search subsequently re-run. See Group records: Write set & Manage saved searches for details. |
|||||||||||||||||||||||||||||||||
|
|
|
Restore a group of records saved with Write set or re-run the search that generated the group of records saved with Write set. Depending on your system, it may be possible to schedule a saved search (a Write-set) to run automatically and print or email the result of the search. See Group records: Write set & Manage saved searches for details. |
|||||||||||||||||||||||||||||||||
|
|
|
Create multiple records with common data simultaneously. This option is only available to users who are authorized to add records to the current data source See How to create multiple records simultaneously: Bulk create records for details. |
|||||||||||||||||||||||||||||||||
|
Record history |
|
|
View the history of changes to the current record See View changes to a record and restore a field to an earlier value for details. |
||||||||||||||||||||||||||||||||
|
|
|
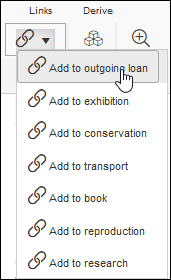
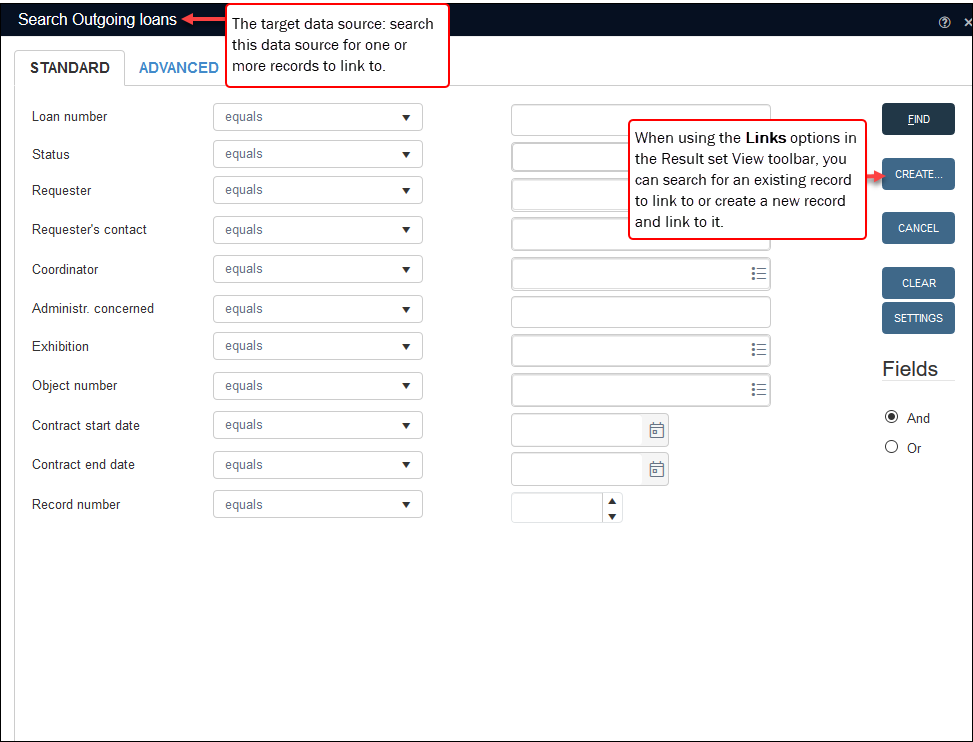
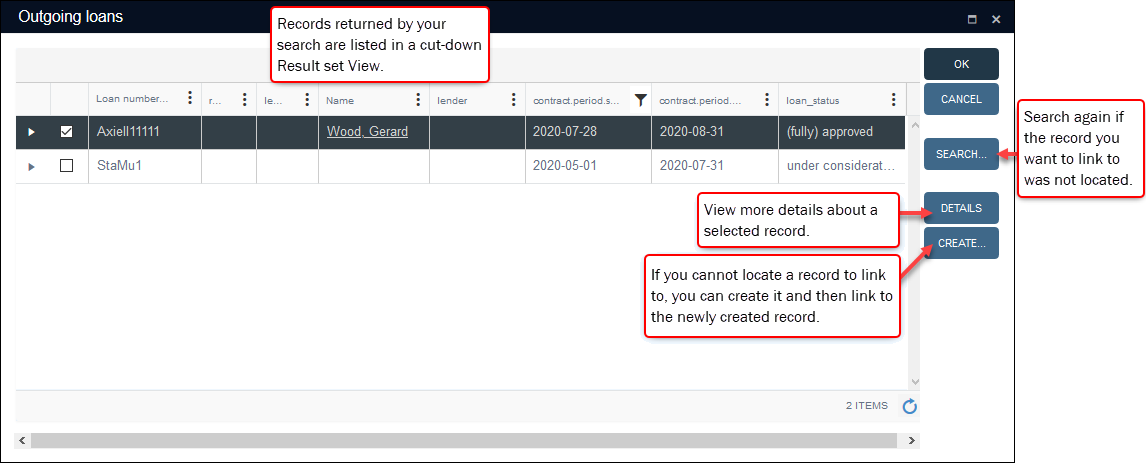
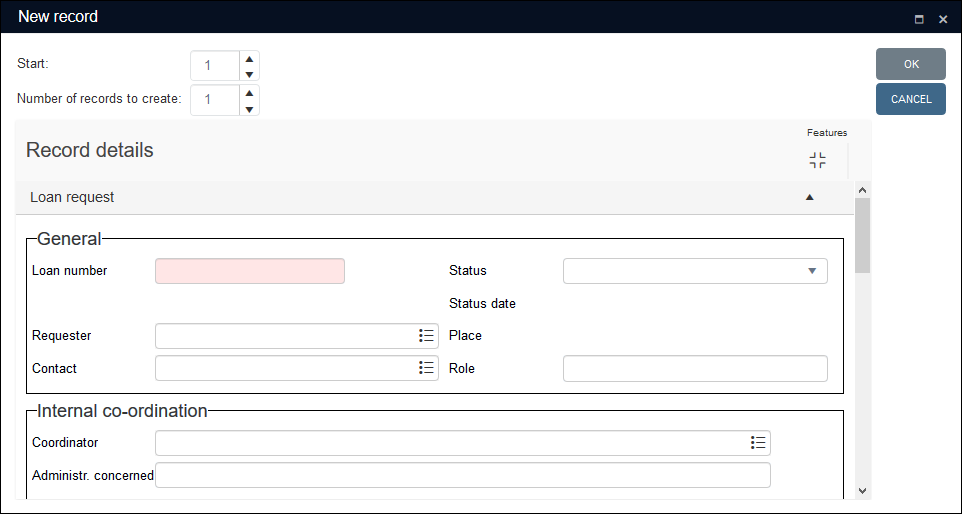
Link one or more records in the current data source Note: Full details about how records are linked in Axiell Collections, and an explanation of link terminology, are available here. The Links drop list provides shortcuts that simplify linking records for specific purposes. Rather than processing one link at a time, we can select one or more records in the current data source, locate one or more target records and automatically link the records. If a target record you want to link to does not exist, you can create it and link to it. The relevant Linked field The options available in the Links drop list are configured by your Application Administrator. If no Link options have been defined for a data source, the Links button and drop list will not display in the Result set View toolbar. The Links button is disabled until one or more records have been marked
|
|||||||||||||||||||||||||||||||||
|
|
|
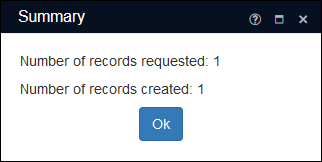
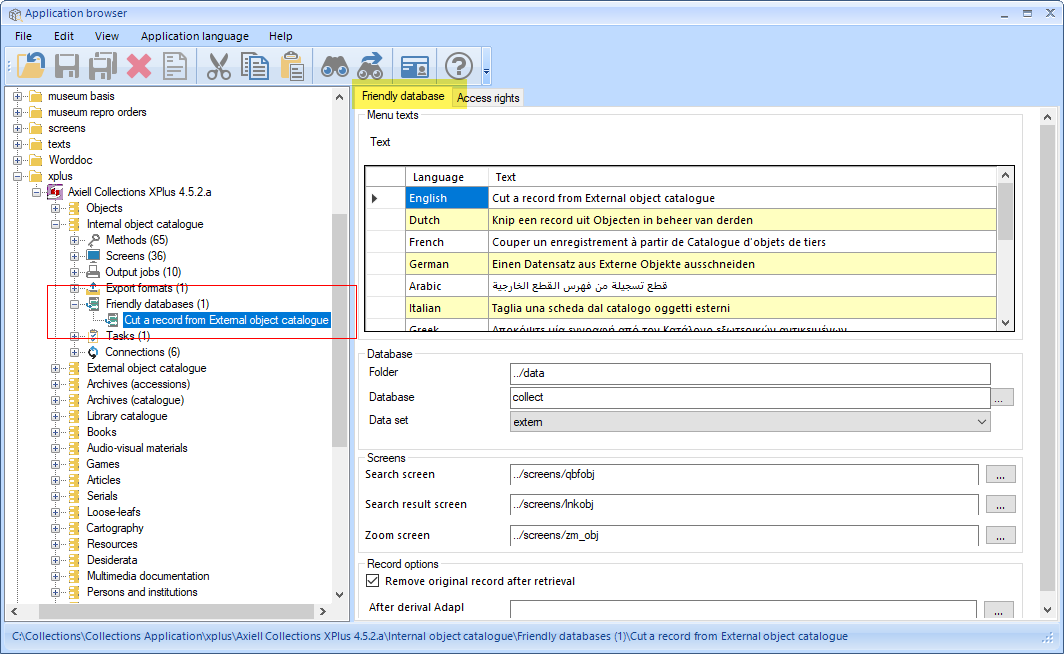
Search for one or more records in a similar data source For each data source the Derive functionality is configured as a Friendly database: Details about configuring the Derive function can be found in the Axiell Designer Help. With the Derive function it is possible to search for records in a compatible data source and copy or move them to the current data source. Compatible data sources hold similar data, and include Accessions and Archives catalogue6. The Derive function is an efficient way to copy or move records from one compatible data source to another. Your Application Administrator configures the Derive function and specifies which data source is searched for compatible records, whether records are copied or moved and what fields are copied / moved from one data source to another. More than one Derive function can be made available in the current data source, in which case the Derive button becomes a drop list:
Place the cursor over the button to display a tooltip with details about what the option will do (cut or copy one or more records from the named data source):
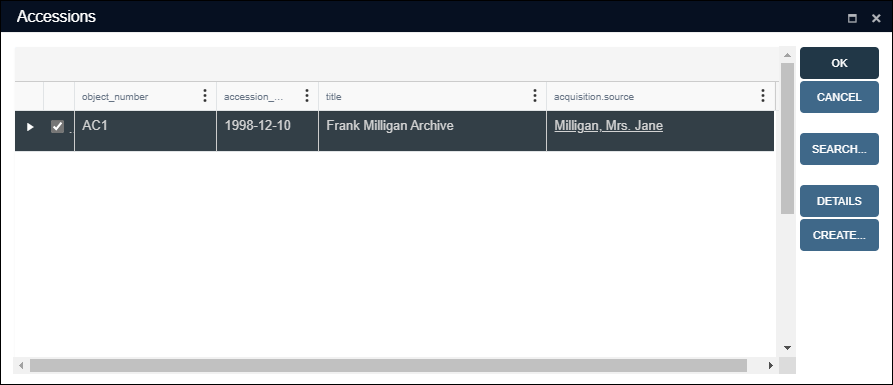
For exampleItems recorded in Accessions become part of your collection. In the Archives catalogue the Derive function can be used to search Accessions for records and copy them to the Archives catalogue:
|
|||||||||||||||||||||||||||||||||
|
Search and replace |
|
CTRL+H |
The Search and replace function can be used to search the current |
||||||||||||||||||||||||||||||||
|
|
|
Record merging functionality7 enables authorized users:
See Merge records for details. |
|||||||||||||||||||||||||||||||||
|
Export |
|
|
Export data from one or more records. See Export for details. |
||||||||||||||||||||||||||||||||
|
|
|
Tasks are defined per data source in an application structure definition ( Details can be found in the Axiell Designer Help. Tasks are bulk editing operations that guide you through a procedure that updates the current The tasks available from the Result Set View toolbar depends on the data source: for instance, the Change locations task is used to update the location of objects and containers and it is found in Catalogue data sources and Locations and containers but it is not available in Persons and institutions. If more than one task is available, the Tasks button will be a drop list:
While tasks can be designed and implemented by your Application Administrator, many are built-in to Axiell Collections. These include: |
|||||||||||||||||||||||||||||||||
|
|
|
Export data from marked While the Export tool provides a lot of flexibility in defining what and how your data is exported, the Export to Excel option greatly simplifies the export of selected records to an Excel spreadsheet:
To export to excel:
|
|||||||||||||||||||||||||||||||||
|
Settings |
|
|
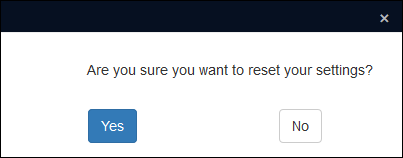
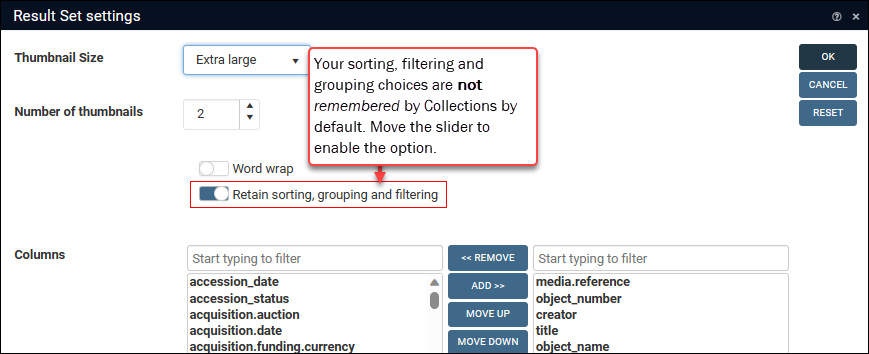
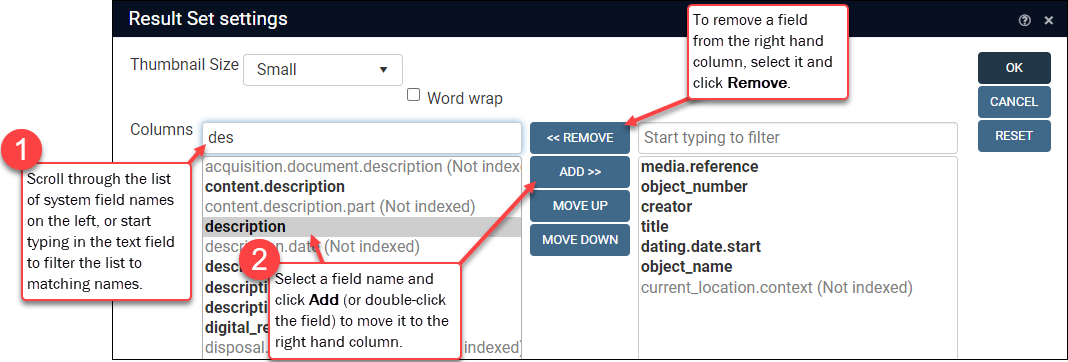
Configure Result set View settings, including which columns (fields) display details from listed records. Your Application Administrator specifies default settings for Result set View, including which columns display details from listed records. You are able to personalize some of these settings. Any changes you make are associated with your user account and recalled by Collections whenever you log in. You can restore the View's default settings by selecting Reset in the Result set Settings box. A message will ask you to confirm the reset:
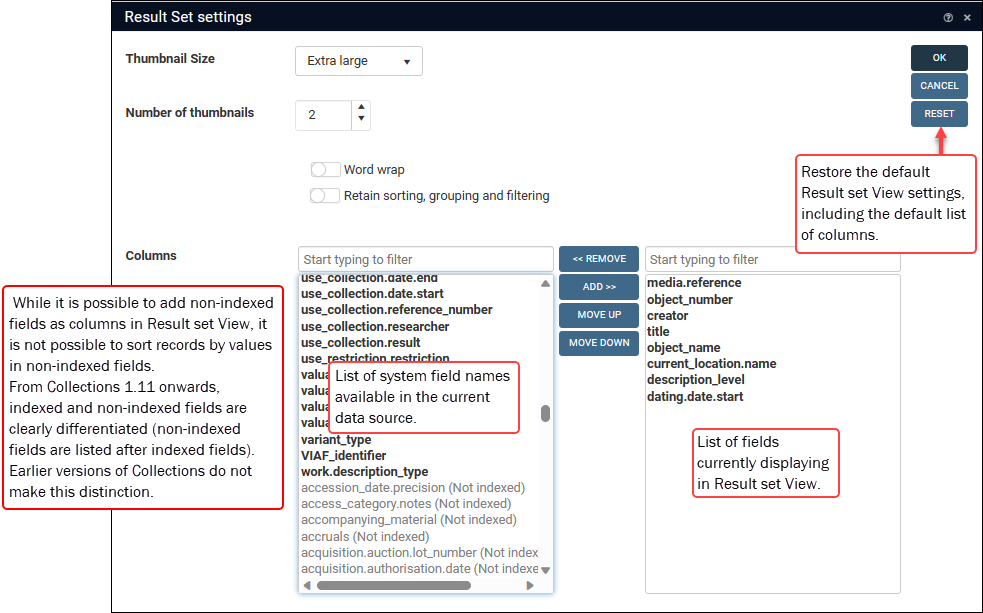
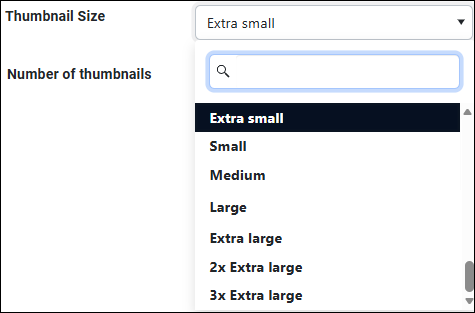
Tip: An option in the Main menu enables you to restore ALL settings you have changed across Collections back to their default. The Reset option in the Result Set settings box only affects this View's settings. The following options are available in the Result set View Settings box: Specify the size of thumbnail images in the media.reference column. In the screenshot at the top of this page, Thumbnail Size = Small. Depending on your version of Collections, up to seven relative sizes are available:
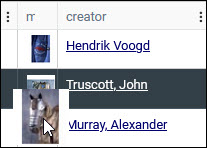
2x Extra large and 3x Extra large9 have a maximum size of 130x130 pixels and 195x195 pixels respectively. By default, only one thumbnail is shown per record in both Result set View and Gallery View. Both Views include an option to set the maximum number of thumbnails to display per record10. As you can see, the number is set independently for each View: If a preferred image has been specified, it will display first. In Result set View it may be necessary to widen the column to view multiple thumbnails. Alternatively, place the cursor over a thumbnail to have any additional thumbnails pop-out:
If the cursor is placed over a thumbnail (including one that has popped-out) for a moment, a slightly larger version will display:
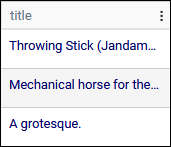
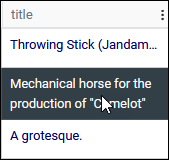
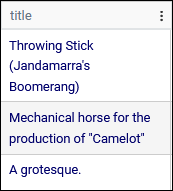
Wrap the contents of fields so that it all displays in a cell rather than as a single line of text cut off at the cell's border. Without Word wrap:
Note: even if Word wrap is not enabled, the full contents of a field will display whenever the cursor is over the field:
With Word wrap:
Note: In Collections version 1.10.1 and older this option is only available if Scroll Mode = Paged. It is possible to sort, filter and group records in Result set View. From Collections 1.17 onwards it is possible to have Collections remember your sorting, filtering and grouping choices by enabling the Retain sorting, grouping and filtering option (for each data source in which you sort, filter and/or group records):
Note: In versions of Collections older than 1.17, any sorting, filtering and/or grouping you applied in Result set View is lost when you perform a new search. If your version of Collections is prior to release 1.10.1 it will include two additional record display options: Two options are available:
There is no difference in performance between the two modes as Virtual mode displays 40 records in the first instance and then retrieves the next 40 as you scroll beyond the current list. Two options are available:
Add or remove columns from Result set ViewIf the default set of columns in Result set View does not meet your needs, you can add or remove columns. Note about sorting values in columns:
To add columns:
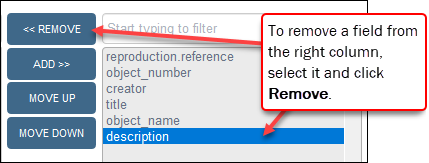
Tip: A useful field to add is priref; this stores the unique reference number for a record. To remove columns:
|
||||||||||||||||||||||||||||||||
|
Deep link13 |
|
|
Copy a link to the search query that generated a list of records in Result set View. Copying and sharing a link to the current record
A message confirming that the link has been copied to the Windows clipboard will display in the right upper corner of the browser window:
The link can now be pasted and shared. Note: The link will not work if you paste it into the Address bar of a browser tab that is already running Collections. When a user clicks the link in an email etc., Collections will always open in a new tab. |
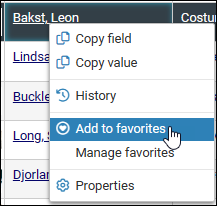
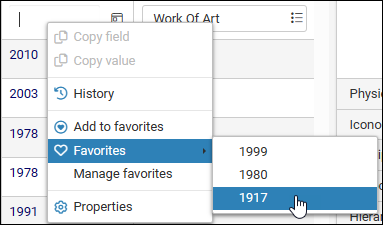
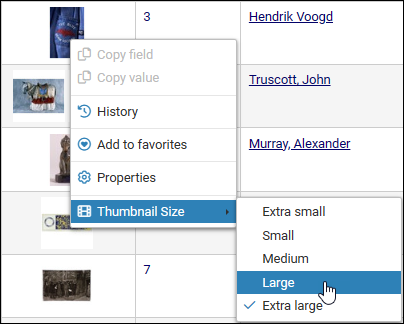
Right-click a cell in a row to display a context menu:
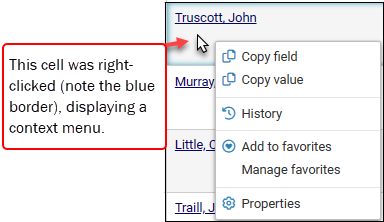
Notes:
- The cell with the checkbox does not have a context menu.
- Which options are enabled/ available in the context menu will depend on the data type of the field in the selected cell (Copy field and Copy value are not enabled when right-clicking a cell in the reproduction.reference column for example).
Options:
| Option | Details | ||||||||||
|---|---|---|---|---|---|---|---|---|---|---|---|
|
Copy field |
Copy the contents of the field to the Collections Clipboard: the field's contents are stored in the Collections clipboard, and from there can be pasted into the same field in other records (overwriting an existing value in the field). Although it is not possible to paste a field's contents to another record in Result set View, this functionality is useful when editing records in Record details View: you can use Copy field in Result set View to copy a field's contents to the Collections Clipboard and then paste the contents in another record in Record details View. Full details about working with the Collections Clipboard are provided here. |
||||||||||
|
Copy value |
Copy the contents of the field to the Windows clipboard. Use the keyboard shortcut CTRL+V to paste the value elsewhere (for instance, into a field in another record). See Edit below for details about editing a record in Result set View. |
||||||||||
|
History |
When set up for a data source
See View changes to a record and restore a field to an earlier value for details. |
||||||||||
|
Add to favourites |
Add a value to a list of favourites for the current field. In Display or Edit mode
The value is added to a list of favourites for the current field, and from there it can be selected and added to a field when editing a record (in Result set View and Record details View). If this is the first value saved to the favourites list for this field, two options are added to the context menu: Favourites and Manage Favourites. A favourite is saved:
|
||||||||||
|
Favourites |
In Edit mode This option only displays in the context menu when a value has been added to the favourites list for the current field using the Add to favourites option. Tip: When selecting a favourite to add to a Linked field When one or more values have been saved as favourites for the current field (using the Add to favourites option), a value can be selected from the list and copied to the field when editing a record. This can be useful if the same value (term, name, date, etc.) is entered into a field as it can be selected from the favourites list rather than being keyed into the field. To copy a favourite value to a field when editing a record:
The value is copied to the field and will overwrite any value already entered in the field. Note: If a value is cut off in the list because it is too long, you can select Manage favourites to view the full value. |
||||||||||
|
Manage favourites |
With the Manage favourites option it is possible to change the order of values in the list of favourites for the current field, delete a value from the list, remove all values from the list, and view the complete text of a value. This option only displays in the context menu when a value has been added to the favourites list for the current field using the Add to favourites option. Select this option to display the Manage favourites box: Here it is possible to:
|
||||||||||
|
Properties |
Display the Field properties box with details about the properties of a field and the data it contains. Details here. |
||||||||||
|
Thumbnail Size14 |
Control the size of thumbnails:
Note: This option only displays when right-clicking a thumbnail. |
Depending on your version of Collections, the three dot ellipsis in a column header will have options to sort, filter and group records, and to rearrange columns:
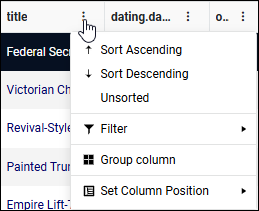
Note: Only the Set Column Position option is available if a field is not indexed.
Details about:
The order of columns in Result set View is determined in the Result Set settings box, which is accessed by selecting Settings in the Result set View toolbar:

As well as changing the order of columns via Settings, there are several other ways to achieve this:
Drag and drop
A simple way to change the order of columns is to:
- Click anywhere in a column header and hold down the mouse button.
- Drag left or right and release the mouse button.
Ellipsis
Another way to change the order of column is to:
-
Click the ellipsis option in a column header.
-
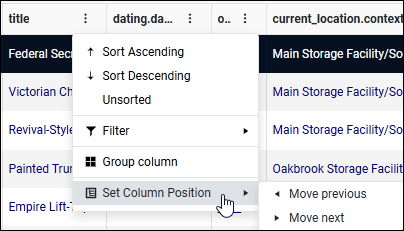
Select Set Column Position and then either Move previous or Move next to move the column to the left or right of its current position:
The Status bar shows the number of records in the current result set (the records returned by a search or retrieved from a Group for instance), as well as the number of marked records:

When records are returned by a search, the search statement displays in the Result set View Status bar15. The search statement displays differently depending on the type of search performed:
- Standard search
When performing a search on the Standard tab of the Search box, the field tag
 A field tag is a unique two character identifier for a field. for a searched field will display rather than the field name. In this example:
the field tag associated with the Object number field is
IN:
- Advanced search
When performing a search on the Advanced tab of the Search box, the search terms entered in the Search statement box:

will be displayed in the Result set View Status bar:

- Saved search
When running a saved search, the Status bar only shows the unique Id number of the saved search preceded by the term pointer (a saved search is stored in Collections as a pointer file). For example, if the saved search with ID 2 is selected and restored:
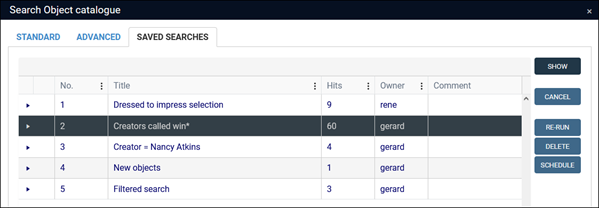
the Status bar will show:

- Running a Basic search / Simple search from the Result set View toolbar
The Result set View and Gallery View toolbars include a basic search option pre-configured to search across one or more fields in the current data source
 The management of a collection can involve a vast amount of information about objects / items / books, people and organizations, events, administration and more. This information is stored as records in data sources. Each data source stores a specific type of information: details about collection items, people, events, loans, and so on.:
The search statement displaying in the Status bar is the same as when performing a Standard search, and the field tag will display rather than the field name:

Searches available from the Search drop list can be configured to run across multiple fields simultaneously (notably the <Simple search> option):

In this case the search statement may be quite long and therefore only partially displayed in the Status bar. Hover the mouse over the search statement to view the full statement in a tooltip:

- Related records View
Selecting a record in Related records View implicitly runs a search for the record and the Status bar will update to reflect this:

Working with records
When records are listed in one or more Views, it is possible to move through the list of records using the Record navigation buttons in the top Toolbar or their keyboard shortcut:
| Record | Button | Keyboard shortcut | Description |
|---|---|---|---|
|
First |
|
CTRL+F6 |
Move to the first record in the current list of records. |
|
Previous |
|
F6 |
Move to the previous record in the current list of records. |
|
Next |
|
F5 |
Move to the next record in the current list of records. |
|
Last |
|
CTRL+F5 |
Move to the last record in the current list of records. |
As you move through a list of records the current record![]() The record currently displayed in Record details View or highlighted (with a solid background) in Result set View or Gallery View for instance. in each View is always the same (the current record in Result set View is the record displayed in Record details View for instance).
The record currently displayed in Record details View or highlighted (with a solid background) in Result set View or Gallery View for instance. in each View is always the same (the current record in Result set View is the record displayed in Record details View for instance).
It is also possible to navigate through a record set in Result set View by first right-clicking a cell to select it (the cell acquires a blue border). With the exception of the cell holding the checkbox, a context menu will display:
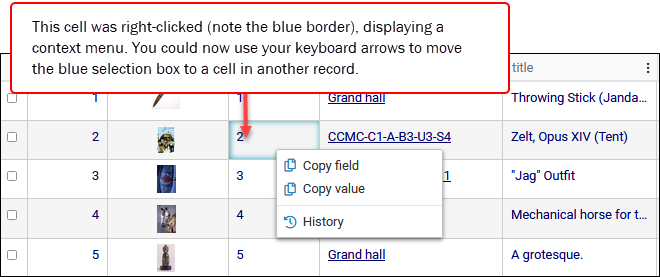
It is now possible to use your keyboard arrows to move the blue selection box to another cell in any other record. Press the space bar to make the record with the selected cell the current record![]() The record currently displayed in Record details View or highlighted (with a solid background) in Result set View or Gallery View for instance..
The record currently displayed in Record details View or highlighted (with a solid background) in Result set View or Gallery View for instance..
Sorting of records is best performed in Result set View in which records are listed in a table of two or more columns:
- Each column (with the exception of the first, which holds a checkbox) is a field in the record.
- Each row holds a single record.
- Each cell in a row can hold a single value. If a field can hold more than one value (author.name (au) for instance), only the first occurrence
 If a field in the current record can have more than one value, we add an occurrence of the field for each value (e.g. a book can have multiple authors so we add an occurrence of the author.name (au) field for each author). An occurrence can be a member of a group of fields, and adding an occurrence of the field adds all members of the group at once. displays in a cell (more details here).
Tip: Although we demonstrate how to sort items (rows) in Result set View, the broad technique described here is the same for sorting items in all of the many tables you will come across in Collections.
Records can be sorted on the values in one or more columns, which can be in one of three states:
- Sort Ascending (e.g. A to Z, 1 to 9)
- Sort Descending (e.g. Z to A, 9 to 1)
- Unsorted
This is the default order for records returned by a search. Records are listed by their unique reference number (priref
 A record's unique identifier (aka Record number). The Record number field is found on the Management details (or Notes and description) panel in Collections version 5.0 onwards. Alternatively, add the priref column to Result set View. The field tag for the priref field is %0.) in ascending order (e.g. 1 to 9).
Tip: It is useful to include priref in Result set View. See Settings for details about adding a field (column) to this View.
Notes
- Although non-indexed fields can be added as columns in Result set View, it is not possible to sort records by values in non-indexed fields. To help identify which fields are indexed and which are non-indexed, they are clearly differentiated in the list of fields in Result set settings16.
- It is not possible to sort on long text fields such as Notes and Description even if they are indexed. These fields typically have a
Free textindex, which cannot be sorted. An exception is often the (documentation) Title field. - If you need to sort records by values in a field that is not included in the Result set View, it is possible to add (and remove) columns by selecting Settings in the Result set View toolbar.
- All records listed on every page in Result set View are sorted simultaneously, not just the records listed on the current page. In this example, all 103 records across every page will be sorted together:

In this example, records are sorted by the values in creator:
- Click the column header once:
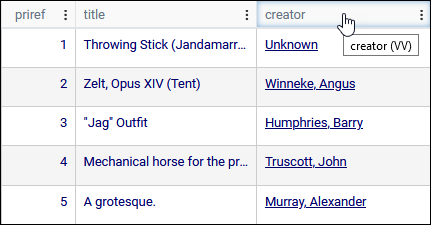
The records are sorted in ascending order by the values in the column. An arrow in the header indicates the direction of the sort:
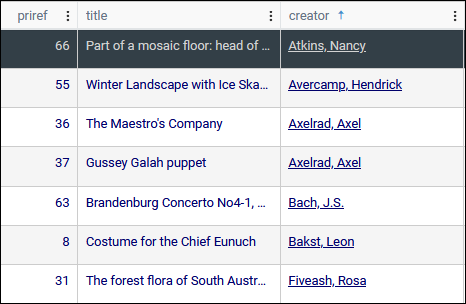
- Click the column header and the records are sorted in descending order by the values in the column:
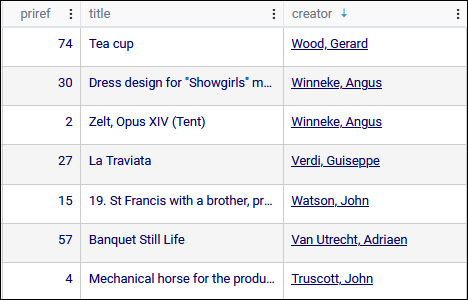
- Click again to return the records to their unsorted state.
Alternatively, (and depending on your version of Collections) you can use the sort options available from the three dot ellipsis in a column header. The current sort state is highlighted:
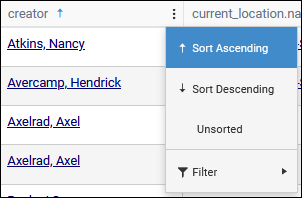
Having sorted records on the values in one column, we can then sort those records on a second (third, fourth, etc.) column.
For example, we have sorted records by the values in creator and as a result all records for items by each creator are listed together:
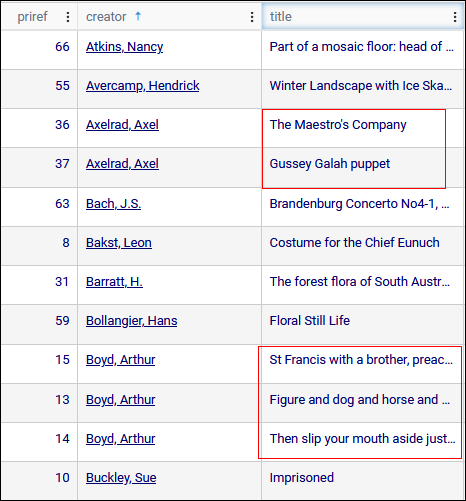
We can now add a second sort so that records are then also sorted by title:
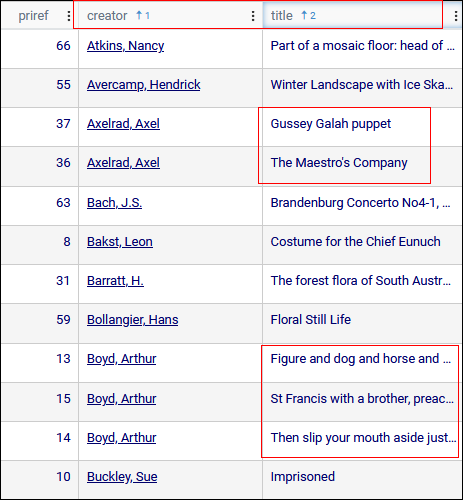
Note that the header not only includes an arrow indicating the direction of the sort (ascending in this case) but a number indicating the sort order (records are sorted by column 1 and then by column 2, and so on).
You can sort records by as many columns as you require.
Some fields can hold more than one value. A book, for example, can have more than one author and in the record for the book each author's name will be recorded as a separate occurrence![]() If a field in the current record can have more than one value, we add an occurrence of the field for each value (e.g. a book can have multiple authors so we add an occurrence of the author.name (au) field for each author). An occurrence can be a member of a group of fields, and adding an occurrence of the field adds all members of the group at once.:
If a field in the current record can have more than one value, we add an occurrence of the field for each value (e.g. a book can have multiple authors so we add an occurrence of the author.name (au) field for each author). An occurrence can be a member of a group of fields, and adding an occurrence of the field adds all members of the group at once.:

As explained here however, only the first occurrence![]() If a field in the current record can have more than one value, we add an occurrence of the field for each value (e.g. a book can have multiple authors so we add an occurrence of the author.name (au) field for each author). An occurrence can be a member of a group of fields, and adding an occurrence of the field adds all members of the group at once. in a field will display in a cell in Result set View.
If a field in the current record can have more than one value, we add an occurrence of the field for each value (e.g. a book can have multiple authors so we add an occurrence of the author.name (au) field for each author). An occurrence can be a member of a group of fields, and adding an occurrence of the field adds all members of the group at once. in a field will display in a cell in Result set View.
When sorting records on the values in a column, records are sorted by every occurrence in the field not only the value we see.
This may affect:
If you sort a field in which a record has more than one occurrence of a value, your records may not appear to sort as you might expect. Here we see records sorted in ascending order by values in the creator column. The record with priref![]() A record's unique identifier (aka Record number). The Record number field is found on the Management details (or Notes and description) panel in Collections version 5.0 onwards. Alternatively, add the priref column to Result set View. The field tag for the priref field is %0.
A record's unique identifier (aka Record number). The Record number field is found on the Management details (or Notes and description) panel in Collections version 5.0 onwards. Alternatively, add the priref column to Result set View. The field tag for the priref field is %0. 63 appears to be out of place with Macleod listed before Bakst:
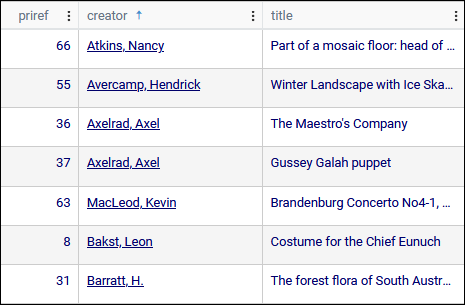
If we look at this record in Record details View, we see that there are two occurrences of creator, MacLeod and Bach:
Only the first occurrence![]() If a field in the current record can have more than one value, we add an occurrence of the field for each value (e.g. a book can have multiple authors so we add an occurrence of the author.name (au) field for each author). An occurrence can be a member of a group of fields, and adding an occurrence of the field adds all members of the group at once. of a field displays in Result set View, but records are sorted by all the values in a field. As we see above, when an ascending sort is performed, this record is sorted by Bach, which obviously comes before Bakst.
If a field in the current record can have more than one value, we add an occurrence of the field for each value (e.g. a book can have multiple authors so we add an occurrence of the author.name (au) field for each author). An occurrence can be a member of a group of fields, and adding an occurrence of the field adds all members of the group at once. of a field displays in Result set View, but records are sorted by all the values in a field. As we see above, when an ascending sort is performed, this record is sorted by Bach, which obviously comes before Bakst.
When a descending sort is performed, this record will be sorted by MacLeod:
In this case the record with priref![]() A record's unique identifier (aka Record number). The Record number field is found on the Management details (or Notes and description) panel in Collections version 5.0 onwards. Alternatively, add the priref column to Result set View. The field tag for the priref field is %0.
A record's unique identifier (aka Record number). The Record number field is found on the Management details (or Notes and description) panel in Collections version 5.0 onwards. Alternatively, add the priref column to Result set View. The field tag for the priref field is %0. 36 now appears to be sorted incorrectly, but it has been sorted by its second occurrence, Smith, which obviously precedes MacLeod in a descending sort.
Another consequence of sorting records on a field with multiple occurrences is that a record may be duplicated for every occurrence it has in the sort field. For example, if a sort is performed on creator and two creators are recorded, the record will be listed twice when the record set is sorted, once for each creator.
From Collections 1.10.1 onwards this is no longer an issue: a record is always only listed once in Result set View.
It is possible to filter records on the values in one or more columns so that only records that match your filtering condition are listed.
Note: It is only possible to filter indexed fields. To help identify which fields are indexed and which are non-indexed, they are clearly differentiated in the list of fields in Result set settings17.
To filter records based on the values in a column:
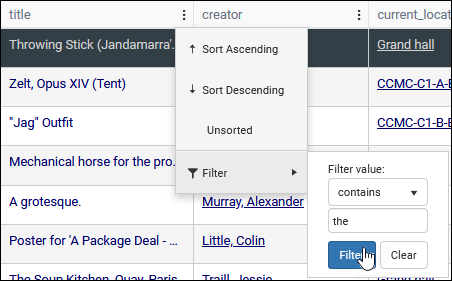
- Click the three vertically aligned dots in a column header (title in this example) and select Filter from the menu:
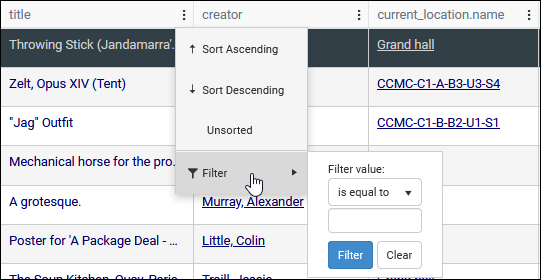
- Depending on the field type you will be able to:
- Select a value from a drop list:
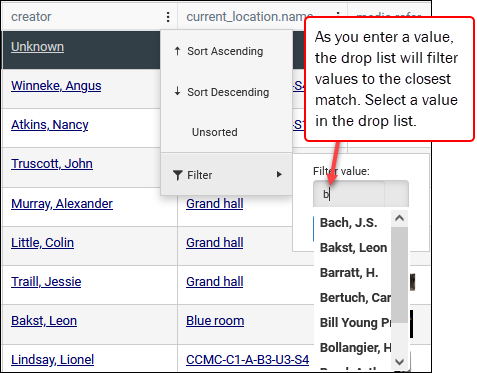
-OR-
- Select an operator from the drop list:
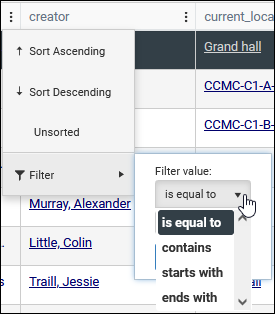
Operator
Details
is equal to
All records that do not match the filter value are filtered out.
contains
All records that do not contain the filter value are filtered out.
starts with
All records that do not start with the specified character(s) are filtered out.
ends with
All records that do not end with the specified character(s) are filtered out.
Note: The filter ignores case and diacritics (accents etc.)
- Enter a value in the text box:
- Select a value from a drop list:
- Depending on the field type you will be able to:
- Select Filter.
All records that do not meet the condition set by the operator and value are filtered out. In this example, only records where the value contains the anywhere in the title field are listed:
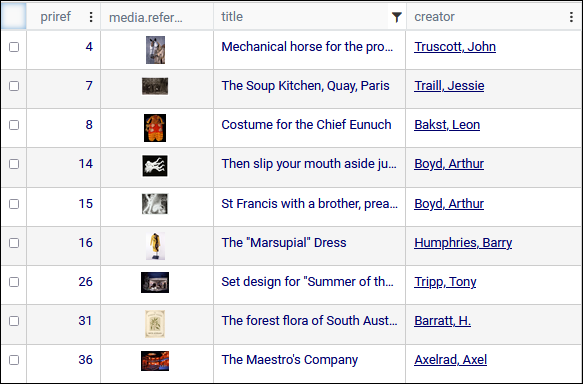
Note the filter
 icon in the column header indicating that a filter has been specified on this column.
 - To further filter the records listed, we could modify the filter on the title column or add another filter on one of the other columns.
Note: If you need to filter records by values in a field that is not included in the Result set View, it is possible to add (and remove) columns by selecting Settings in the Result set View toolbar.
- To remove the filter, select Clear.
Some fields can hold more than one value. A book, for example, can have more than one author and in the record for the book each author's name will be recorded as a separate occurrence![]() If a field in the current record can have more than one value, we add an occurrence of the field for each value (e.g. a book can have multiple authors so we add an occurrence of the author.name (au) field for each author). An occurrence can be a member of a group of fields, and adding an occurrence of the field adds all members of the group at once.:
If a field in the current record can have more than one value, we add an occurrence of the field for each value (e.g. a book can have multiple authors so we add an occurrence of the author.name (au) field for each author). An occurrence can be a member of a group of fields, and adding an occurrence of the field adds all members of the group at once.:
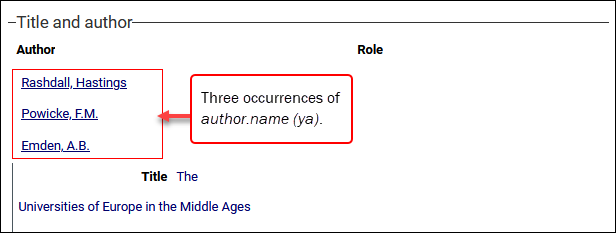
As noted above however, only the first occurrence![]() If a field in the current record can have more than one value, we add an occurrence of the field for each value (e.g. a book can have multiple authors so we add an occurrence of the author.name (au) field for each author). An occurrence can be a member of a group of fields, and adding an occurrence of the field adds all members of the group at once. in a field will display in a cell in Result set View:
If a field in the current record can have more than one value, we add an occurrence of the field for each value (e.g. a book can have multiple authors so we add an occurrence of the author.name (au) field for each author). An occurrence can be a member of a group of fields, and adding an occurrence of the field adds all members of the group at once. in a field will display in a cell in Result set View:
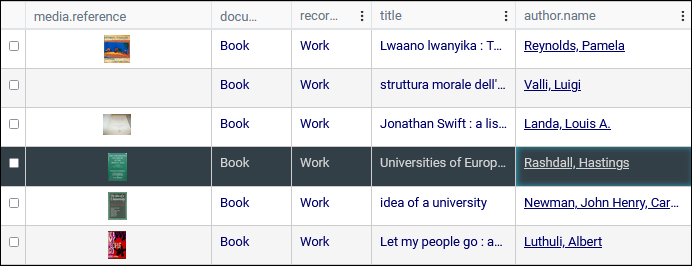
When filtering records on the values in a column, records are filtered by every occurrence in the field, not only the value we see.
In this example, if we specified this filter:
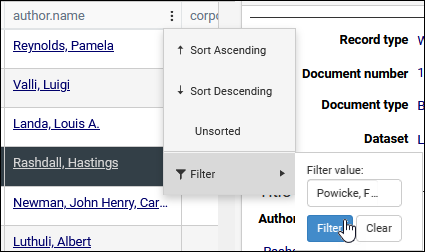
the following record would display even though we do not see Powicke, F.M. in the author.name column:

Depending on your version of Collections, there are two methods to group records by one or more columns:
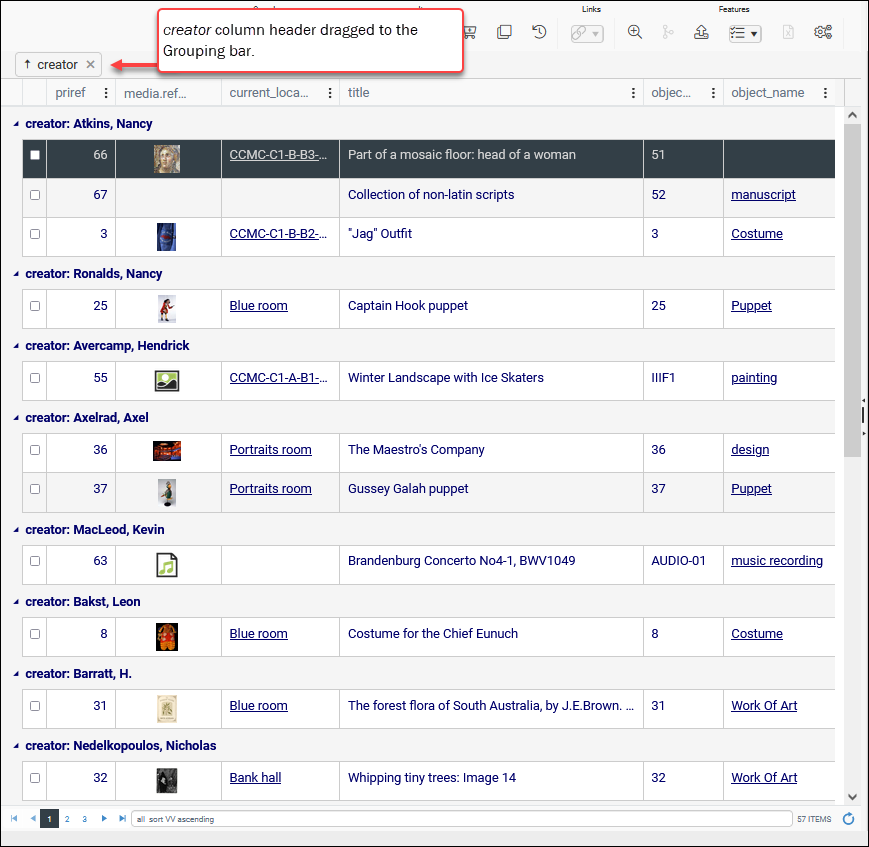
- The first method (which is available in all versions of Collections) is to drag a column header to the Grouping bar, which is located between the Result set View toolbar and the column headers. The Grouping bar is shaded a little darker than the toolbar:

- Alternatively, select the ellipsis option in the column's column header and then select Group column:
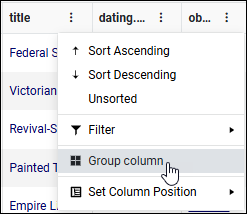
Note: The ellipsis option will change to Ungroup column.
In this example records are grouped by creator - all records that share the same creator are grouped together:
Groups are sorted in ascending order by default (note the direction of the arrow):
![]()
- To reverse the sort order, click the arrow.
- To remove the grouping of a column, click the X (or select Ungroup column from the ellipsis menu in the column's column header) .
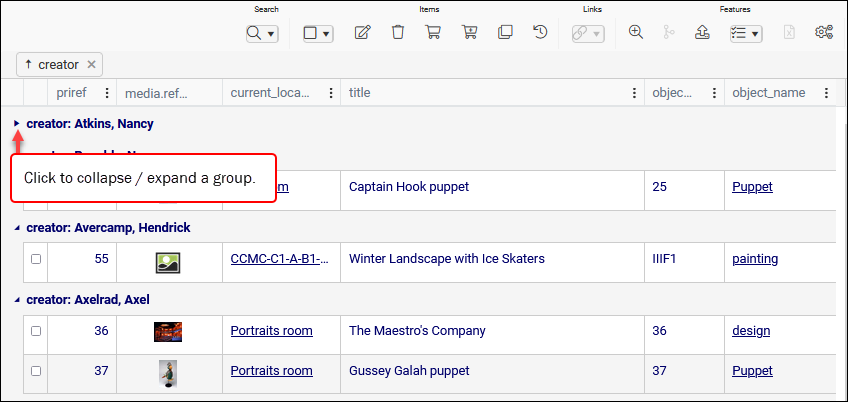
Collapse and expand a group by clicking the triangle beside the group label:
Add another group
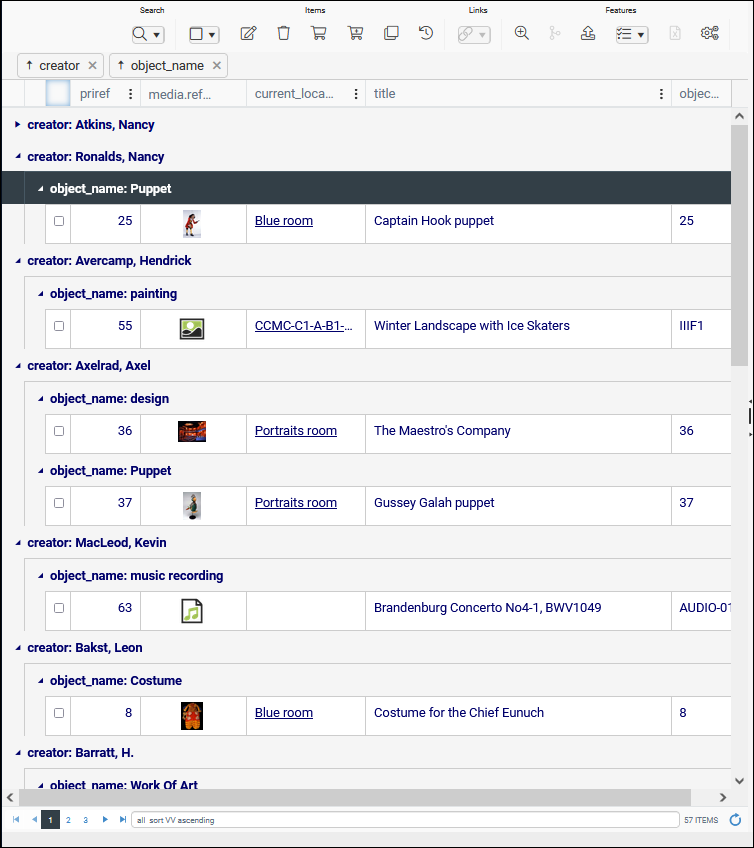
We can add another grouping column (object_name in this example) by using either method described above; a second level of grouping will be applied within the first grouping:
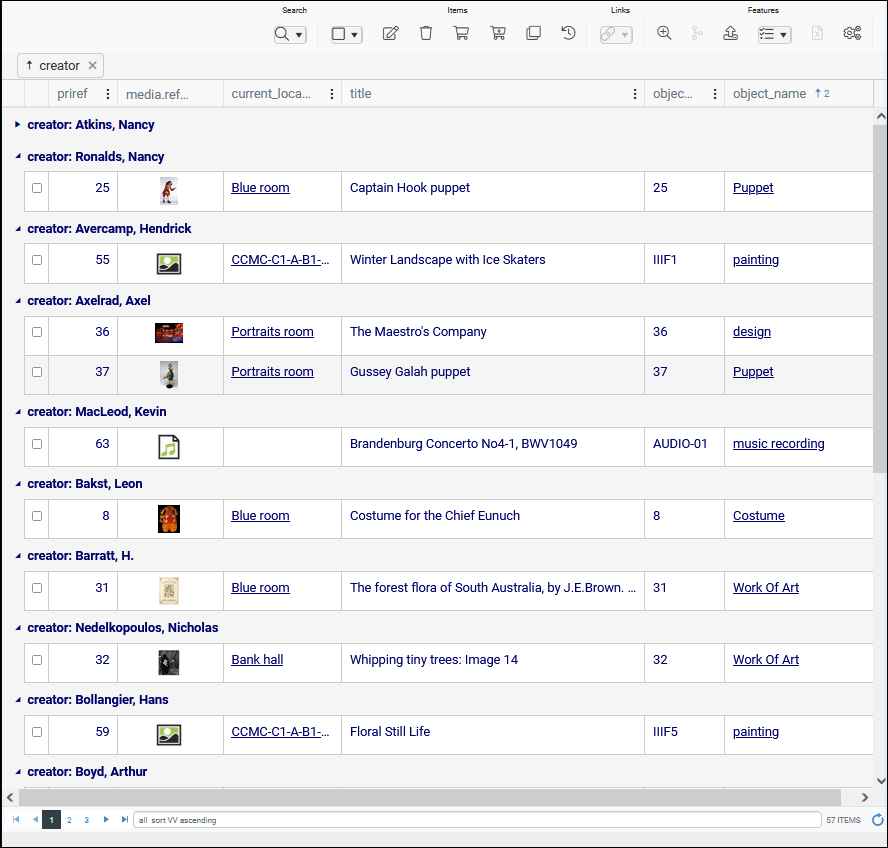
Rather than applying a second group, we could have sorted records on the object_name column and achieved a similar result:




 in the Window footer.












 button in the Result set View and
